
As soon as you activate the theme, a step-by-step Getting Started wizard will appear. By following the instructions, you will easily install the required plugins and demos that you want to. In the second step of the wizard, it will help you to install and activate plugins.
Install & Activate Required Plugins
Initially, Tutorque theme required nine separate plugins to work properly. Check them from the following list below:
- Tutorque Core: Theme core functionality (CPTs and shortcodes).
- Elementor Page Builder: Drag and Drop page builder.
- CMB2: For building meta boxes.
- Contact Form 7: For creating a contact form. (Additionally, we have also provided support for WPForms and weForms)
- WooCommerce: For selling goods online (optional)
- The Events Calendar: For creating Events (optional)
- Widgetkit for Elementor: For creating stylish sections.
- Widgetkit Pro: For creating stylish sections.
- Tutor LMS: Comprehensive LMS Plugin for WordPress (optional)
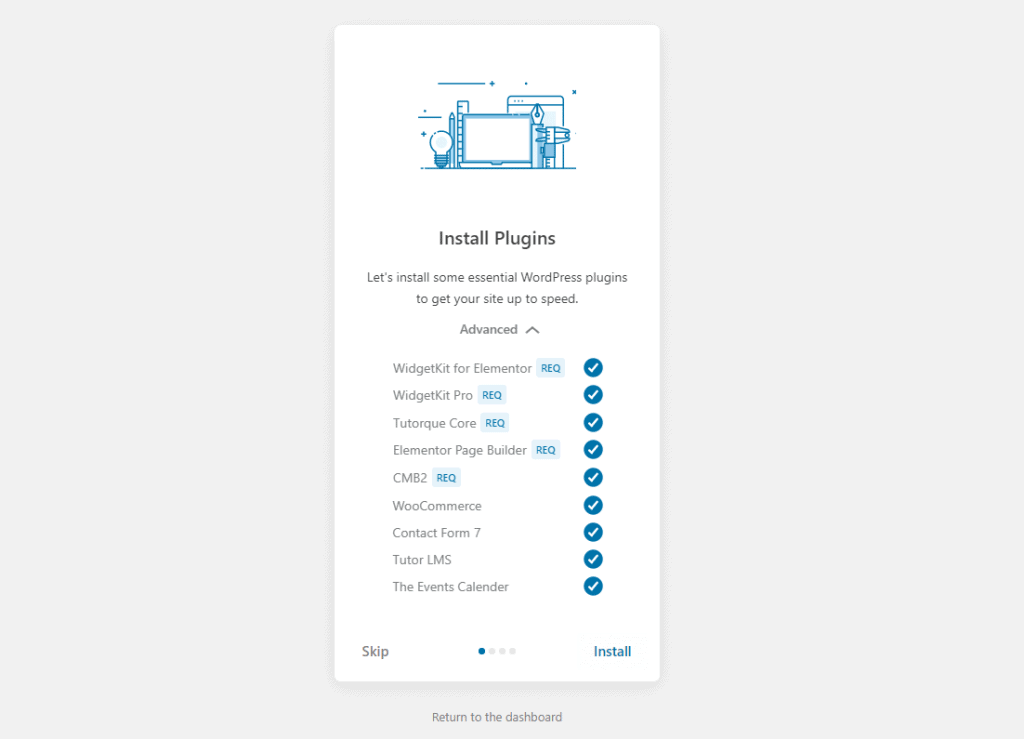
What is the installation process then? Follow the following steps below,
- Click on the INSTALL button to install plugins.
- Wait until the plugin installation process is completed.
- If you don’t want to install plugins or want to install them manually, simply click on the Skip button. That’s it.
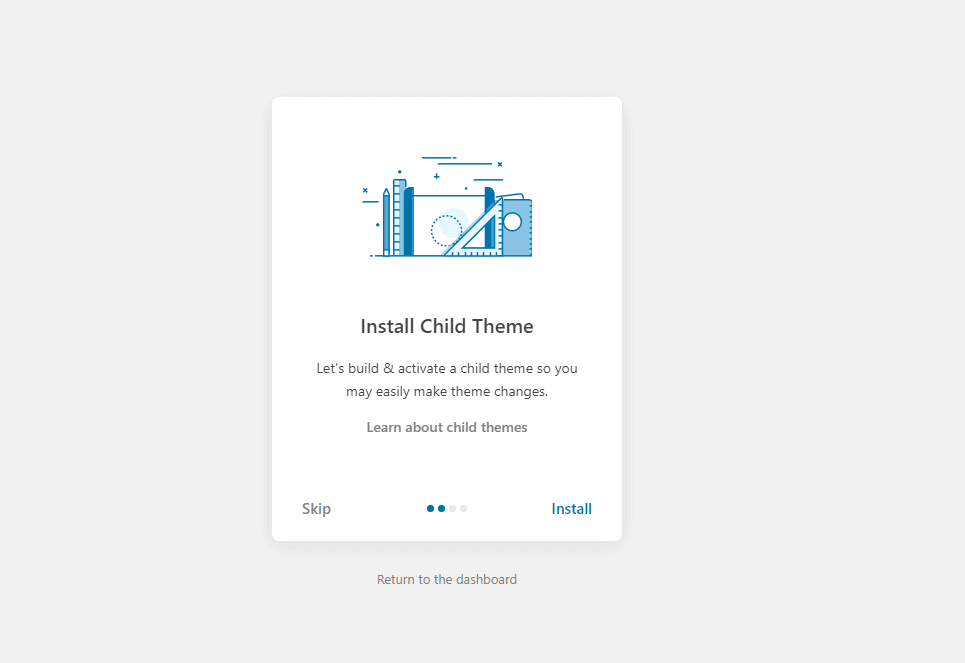
Install & Activate Child Theme
In the third step of the wizard, it will let you install and activate child themes.
However, If you don’t want to install child themes or install it manually, click on the Skip button.
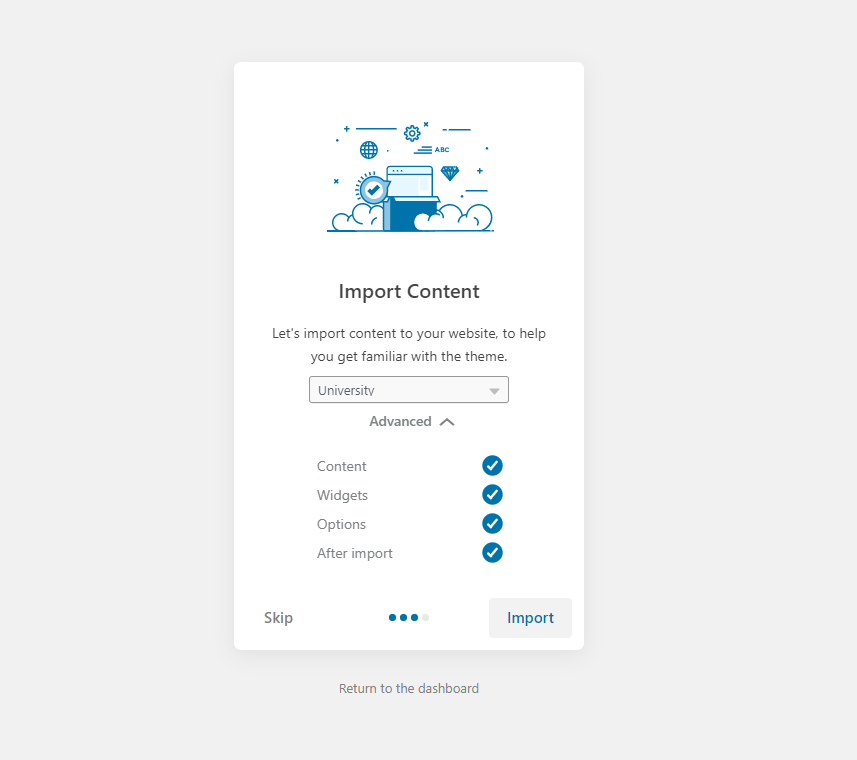
Import Demo Data
In the fourth step of the wizard, it will let you import demo data.
Note: You must have installed all the required plugins before you import any demo data. For importing demo of any LMS, (deactivate any other LMS first) download & install your preferred LMS and then try to import demo data.
Choose the demo from the dropdown and click the import button.
It will take some time to load all demo data on your server. Wait till it shows you a successful data importing message.\
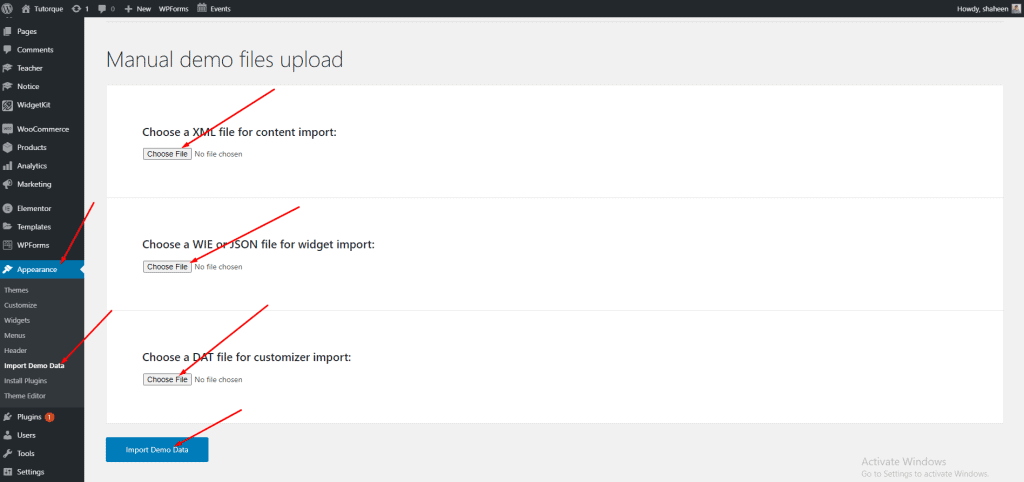
Manual import
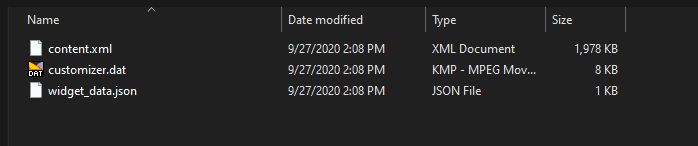
To manually import demo data, you have to open the Tutorque theme package folder and then navigate to the Dummy-data folder. Now, open the demo folder you want to import demo data.
In that folder, there will be three files.
- content.xml
- widget_data.json
- Customizer.dat
However, importing data manually can sometimes be annoying and in that case our suggestion will be to use one click demo import plugin. Just follow the below steps carefully,
- First, install One Click demo import plugin from WordPresss plugin repository.
- Finally, from WordPress dashboard Go to Appearance > Import demo data choose respective files to import
You can also import demo data using wordpress default importer. Therefore, you will need two extra plugins for widget data import and customizer data import. Both are mentioned below.