With time technology is also digitalized and people are taking education from online. In this age of digital education selling courses and other related products in physically would be an act of a fool. You can do all this online in an automated system and without any kind of problem.
Today I am going to show you how to create and sell courses online step by step. Let’s start!
Requirements
Before you make your site and start selling courses, you require a WordPress site, Theme(Learned), and one LMS. You can use any theme or lms you like, it’s totally up to you. At here we used WordPress 5.0, Learned WordPress Education theme(Ultimate Education WordPress Themes Bundle) and LearnPress Lms.
- You can download the Ultimate education themes bundle from this link.
- Download LearnPress from Wp.org
Installation and Activation
Installing procedure is always the same, there is nothing new in installation. Install the theme and activate it the regular way. When you install Learned theme and activate it, LearnPress will be automatically installed.
Ok that’s all for installation, now let’s proceed forward.
Importing Demo or Building Layout
Before you create courses, you need to have a site developed website first. You can do it by creating every single section by yourself or just import a demo layout from the theme.
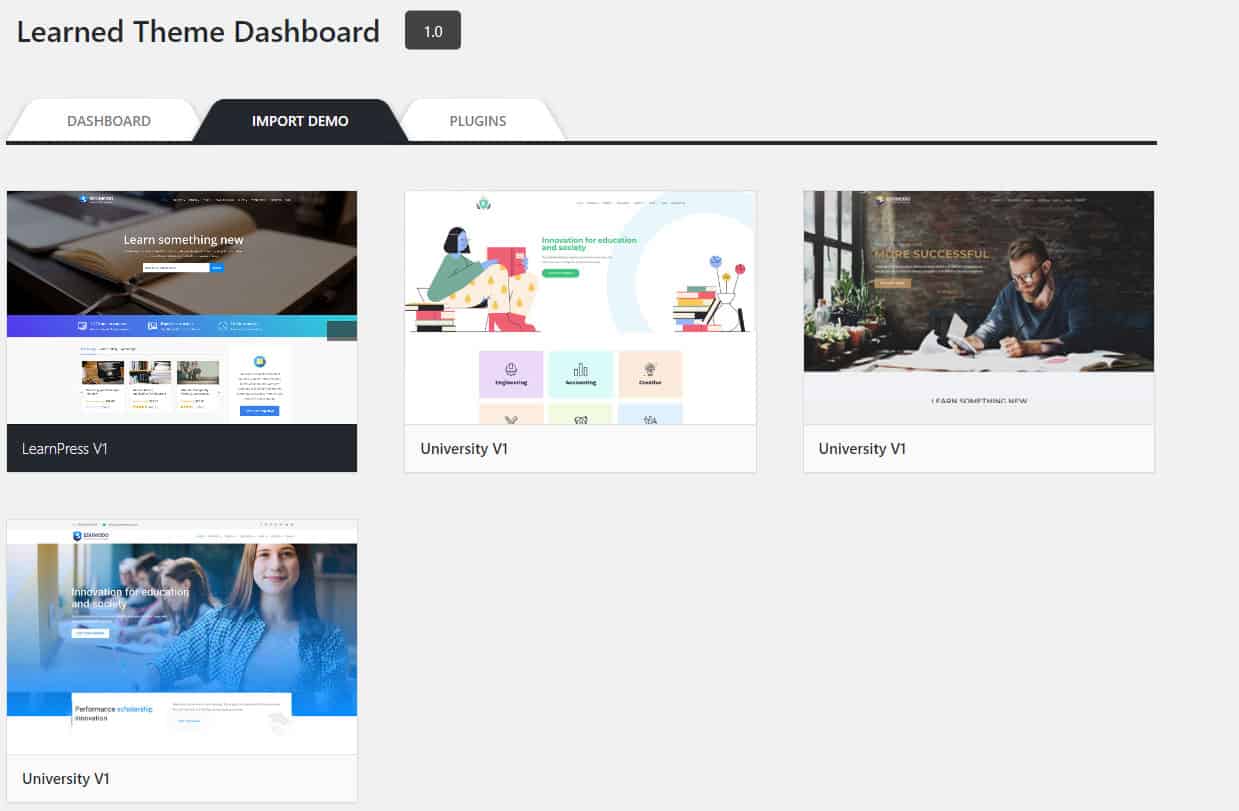
At here we will import a demo. After activating the theme “Getting Started Wizard” will start. Install and activate the required plugins. Now Choose any layout you like and click the import button.
At here I am importing “Learpress V1” layout. After the import is complete, make changes as your demand.
Feel free to alter the settings and layout, after all, it’s your site and you are the owner.
Creating Categories
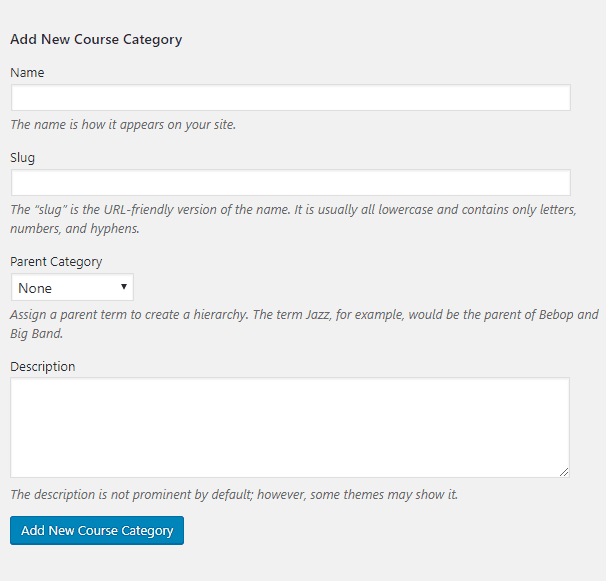
Before you create a course you need to create a category for the course first. To create a category go to LearnPress > Courses > Categories. At here type name, slug, choose parent category (if any) and write the description. In the end, click on ‘Add New Course Category’ and your course category will be created.
Creating Lessons
A Course comes with lessons, quizzes, questions, and other details. Therefore it is necessary to create a lesson, quizzes, questions, etc one after one.
To create a lesson
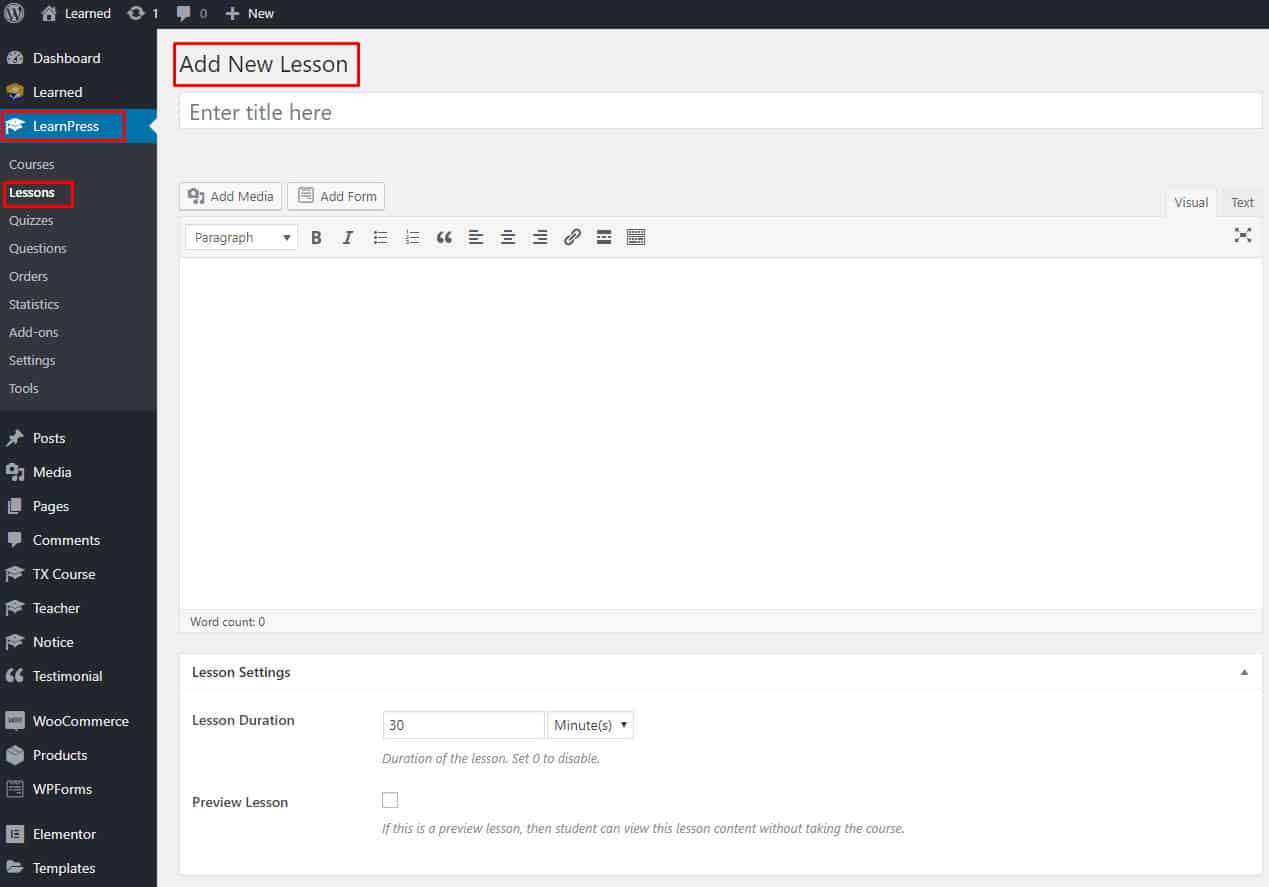
- Go to LearnPress > Lessons > Add New.
- Give a suitable title.
- Add your content of the lesson in the text field.
- On lesson duration of lesson settings, set the duration of the lesson in minutes.
- If you want to show lesson preview then tick the Preview Lesson option.
- If you want you can give permission to other for commenting in the lesson by ticking on “Allow comments” option.
Creating Quizzes
Quizzes allow you to test your learners, and you got the full freedom to make questions as you like. So get ready and start making questions.
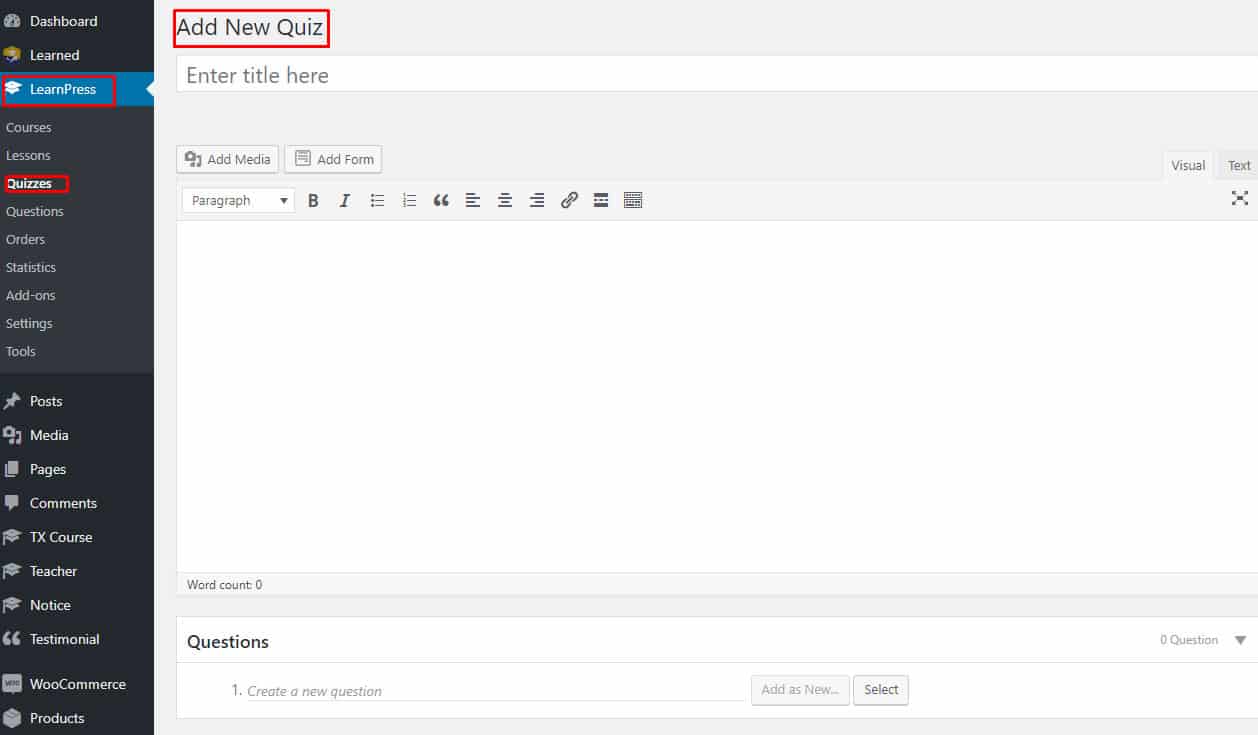
- Go to LearnPress > Quizzes.
- Give your quiz title.
- If any direction or description is needed, fill it in the text area.
Creating Question
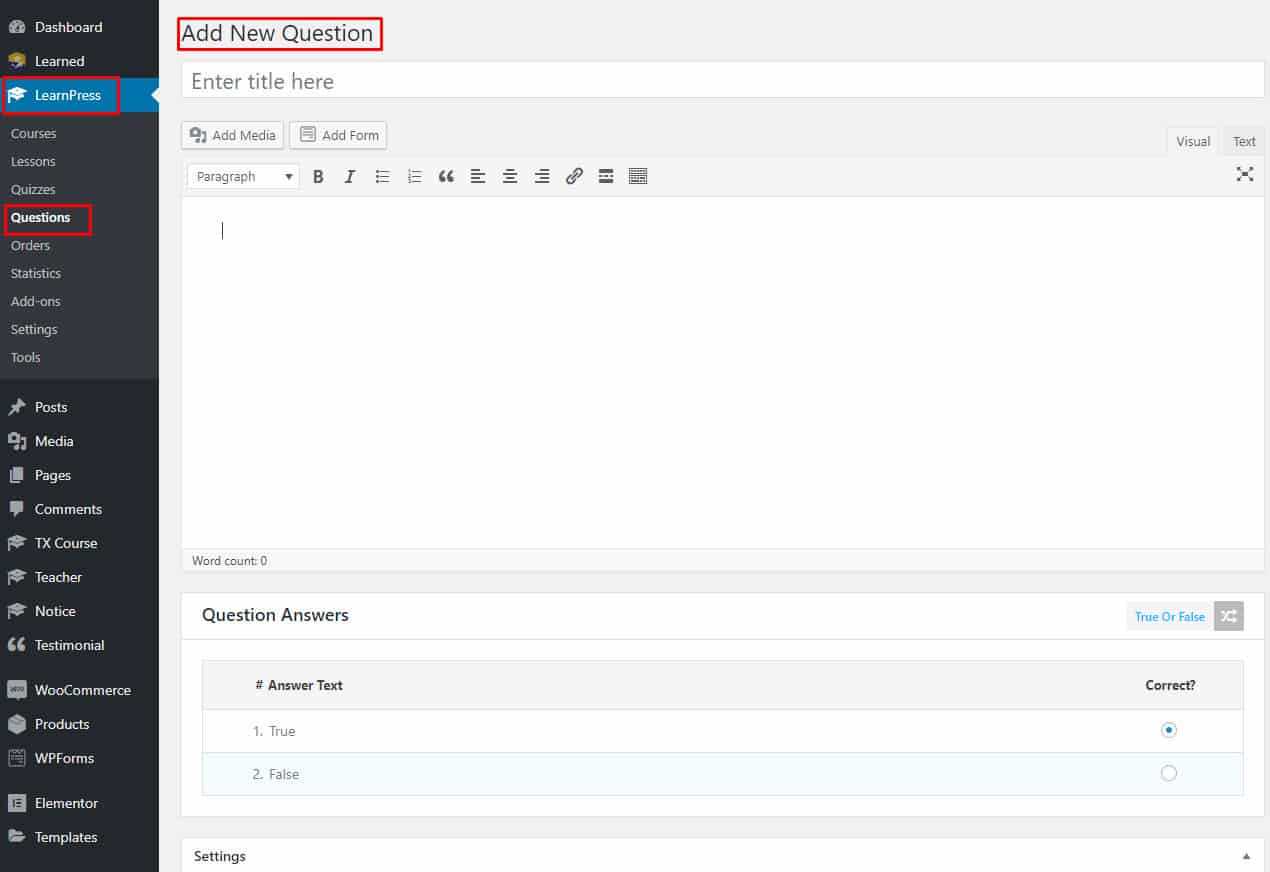
In the questions area, write down your question and click on “Add as New”. Don’t forget to select the type of question.
Answer Text: On creation of a question, a field with details regarding question opens.
Now write the answers in “answer text”, add as much as options you want.
Question Content: You can describe the question additionally in this field.
Mark For This Question: Give marks for choosing the correct answer. Define mark for the correct answer from here.
Question Explanation: A good teacher always explains the problem and you can also be one. Just give an explanation of the question in “Question Explanation” field. After answering the question examinee will be able to see your explanation.
Question Hint: Give any instruction or hint with this option.
In this way, you can create as much as questions you want.
[su_note]In learnpress quizzes, there are three types of question – true or false, MultiChoice, and single choice. You have to choose any of these categories.[/su_note]
If you want to create a very hard question choose multi-choice and you will be able to make sure, students get poor marks. Haha, just kidding. It’s entirely up to you to set the standard of the question.
Pro tip
[su_highlight background=”#2c85ea” color=”#fcf6f6″]First create a question, then click on the duplicate button and edit the data to speed up work. [/su_highlight]
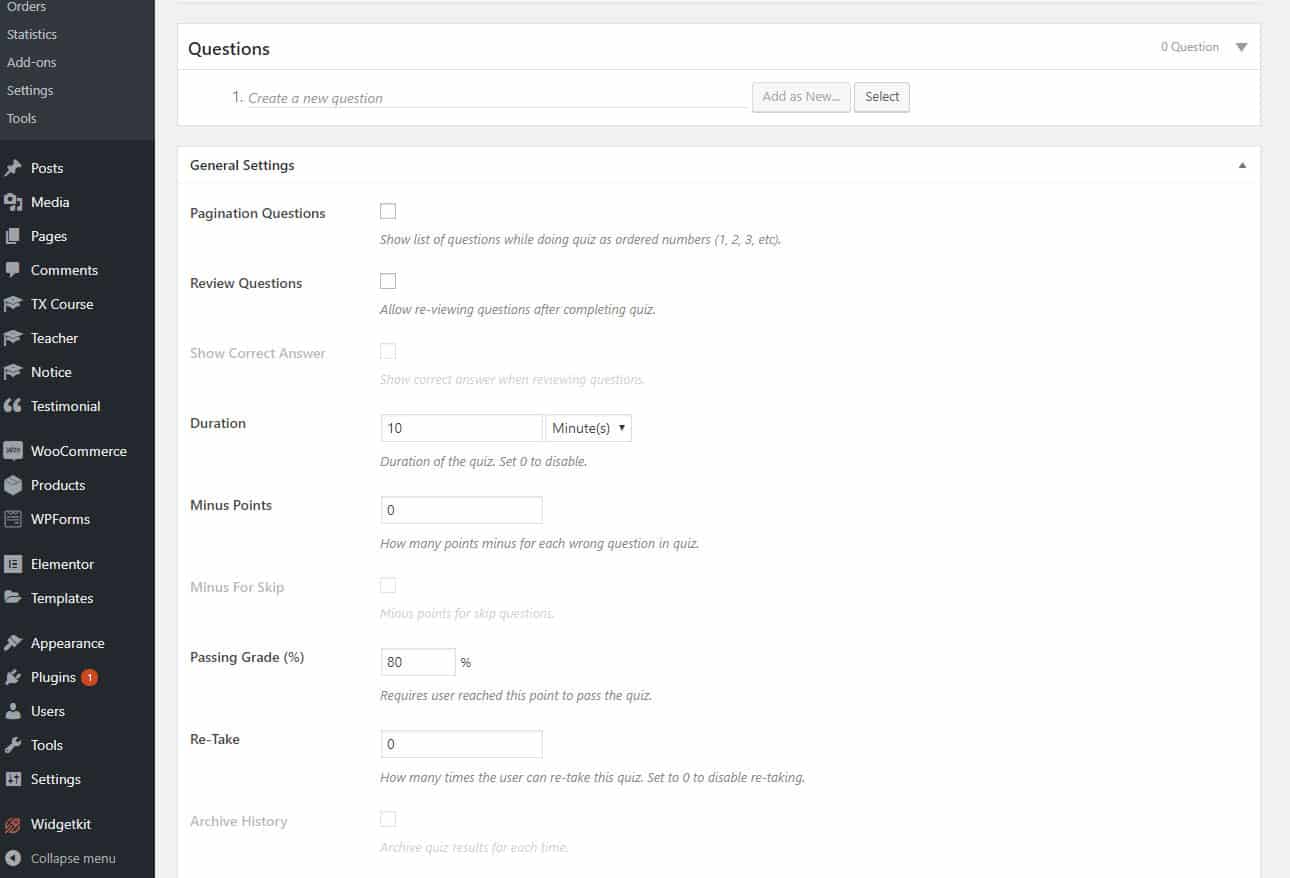
In General Settings there are lots of other options, you can alter these options as you need. Save the changes and your quiz creation is done.
Creating Course
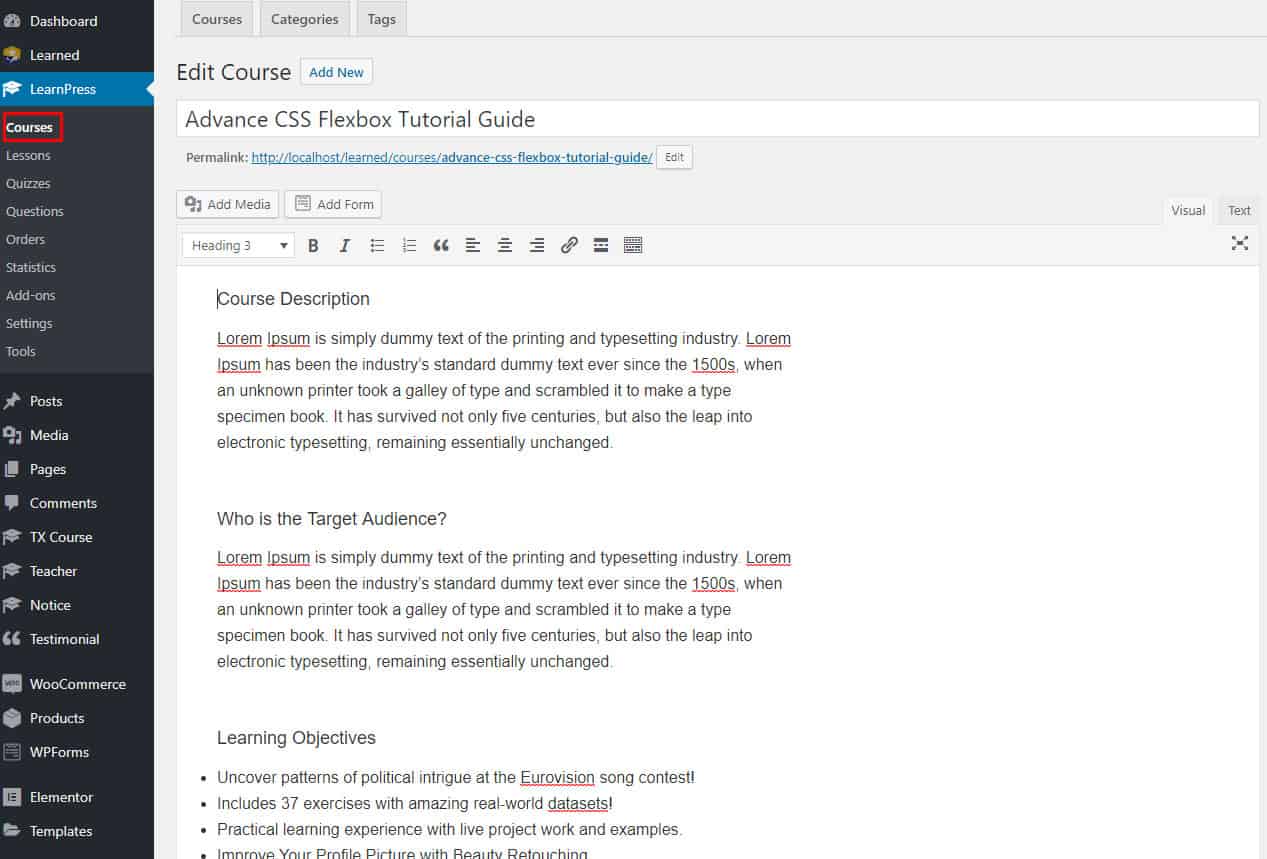
Creating lessons and quizzes is done, now time to create a course.
- Go to LearnPress > Courses > Add New
- Write the name of the course, and choose the category of course. If no category is available, create one.
- In the editor field, add details of the course.
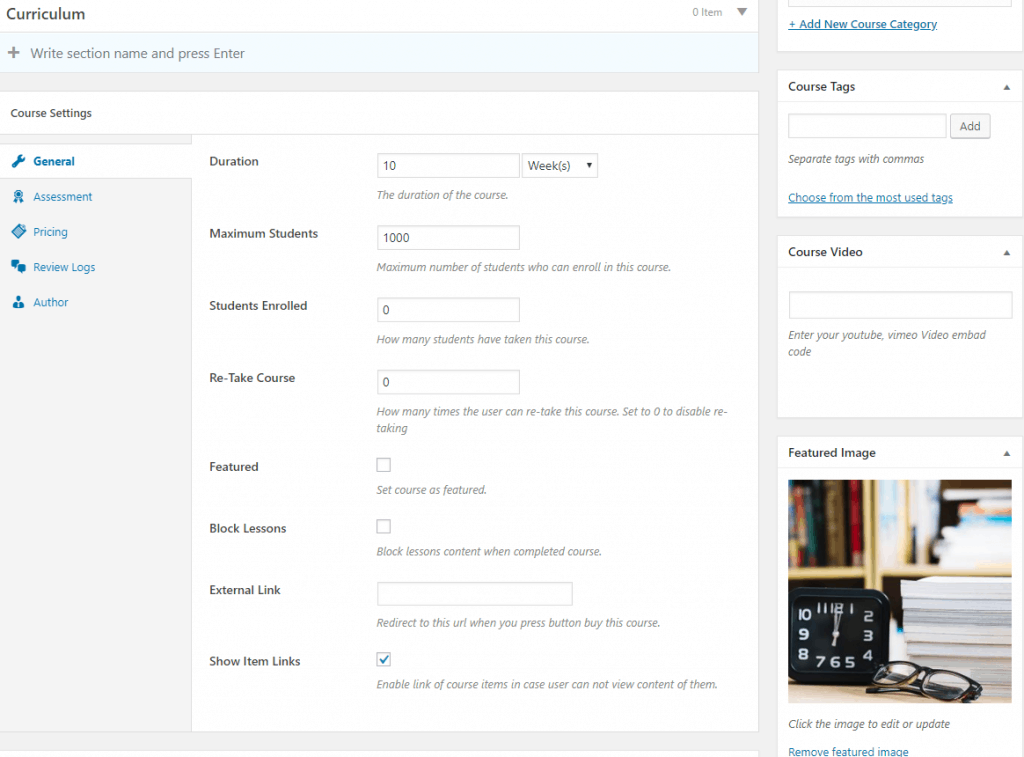
Curriculum
Enter your section name and hit enter. Then click on “Select items” and select any lesson or quizzes one after one. You can arrange the lessons and quizzes by dragging it.
If you forget to create a course or lesson, you can do it from here.
When your done creating your course, its time to check the setting and alter it in the way you want.
Course Setting
General – Set the duration of the course in the duration field, hope you will not allow taking course forever. Therefore set the duration as you desire. In other fields set no of students, no of enrolled, no of retake and other options.
Assessment – After taking an exam you would need to check the papers by yourself, but now you don’t need. Let lms do it and you take rest. Select how course result will be evaluated from ‘course result’ and don’t forget to set the pass mark in ‘passing condition value’.
Pricing – From this option set the price for the course. If you want to set it as a free course leave the ‘price’ field blank. In a different occasion, you can set a selling price of your course. Just put the sale value in ‘Sale Price’. You can set the validity of the sale in ‘Schedule’, just select the ‘sale start date’ and ‘sale end date’.
Author – Select author for the course from here.
In the below fields, set your header image, page title, and other things.
Set up Payments
To set up payments, Learnpress offers you Paypal by default. For using any other payments system you must install and setup it individually.
- Go to LearnPress > Settings > Payments
- Frm the general tab select your checkout page and set other options as you require.
Now from “Paypal” option, click on Enable and add your email address and other required information. Don’t forget to click on ‘save settings’.
Page Settings
- Now its time to set up pages. Go to the Courses tab and from ‘Courses Page’ select the page where courses are located. Then set up rest of the setting as you like.
- Now go to the profile tab select the page for ‘profile page’. Then from Pages, select page for ‘Become A Teacher Page’.
Conclusion
I think now you can create courses on your site very easily. If you want to know about something comment below and we will make sure to tell about it to you.