You already know that we have taken a plan to make a series post on WordPress QuickFix so that our beloved readers that means you won’t face any silly problem while you are developing your project with WordPress.
As a part of that plan, today, I’ve prepared a tutorial guide with relevant screenshots on several topics, including increase max input vars limit, increase upload max file size, increase post max size, increase max execution time, and increase max input time in PHP.
To make it more workable, I’ve shown here more than one way to customize these configurations. After reading this article, you will be able to resolve it from both the .htaccess and the php.ini file. You just need to edit or create those files and write 2-4 lines of code that I am going to give you below.
So let’s check all of these in detail and let me know your feedback, whether it is helpful or not.
How to Fix PHP Max_Input_Vars Limit?
There are several ways to solve this problem. You can try any of the following options or all of the options to increase the max input vars limit.
- Increasing max input vars in .htaccess file
- Increasing max input vars in php.ini file
- Global configuration
- Troubleshooting steps
Increasing Max Input Vars in .htaccess File
Step 01: Login to your cPanel.
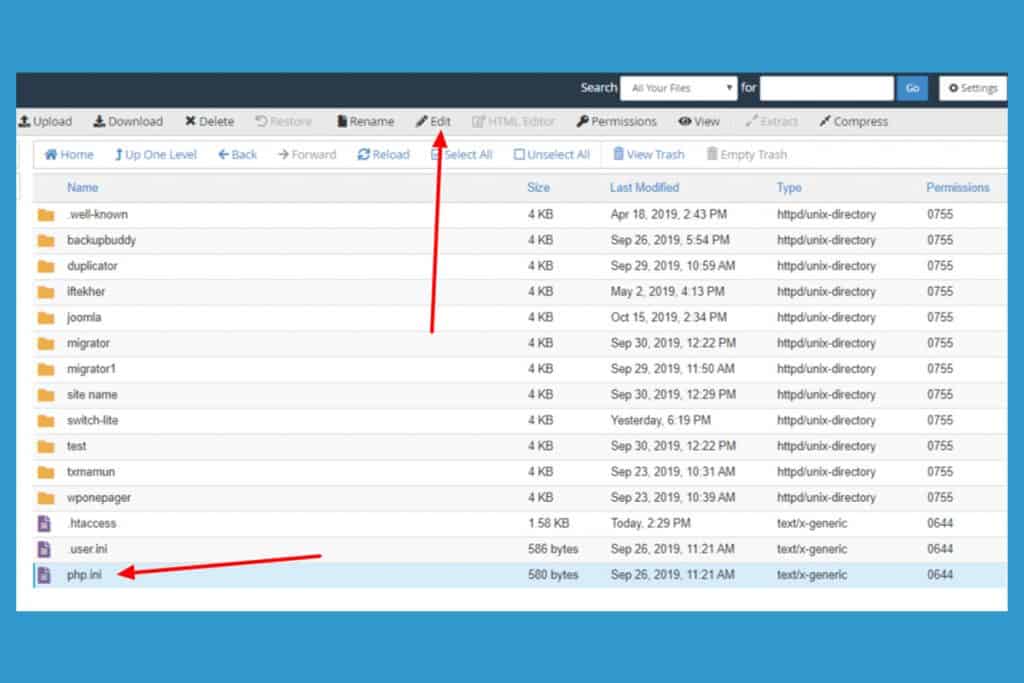
Step 02: Go to File Manager.
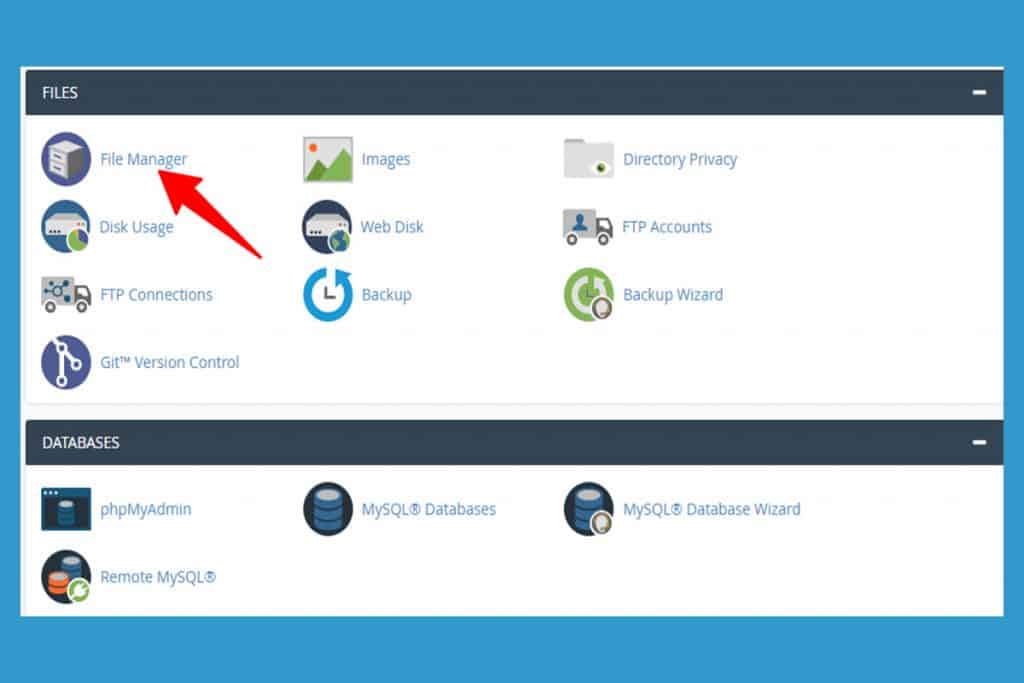
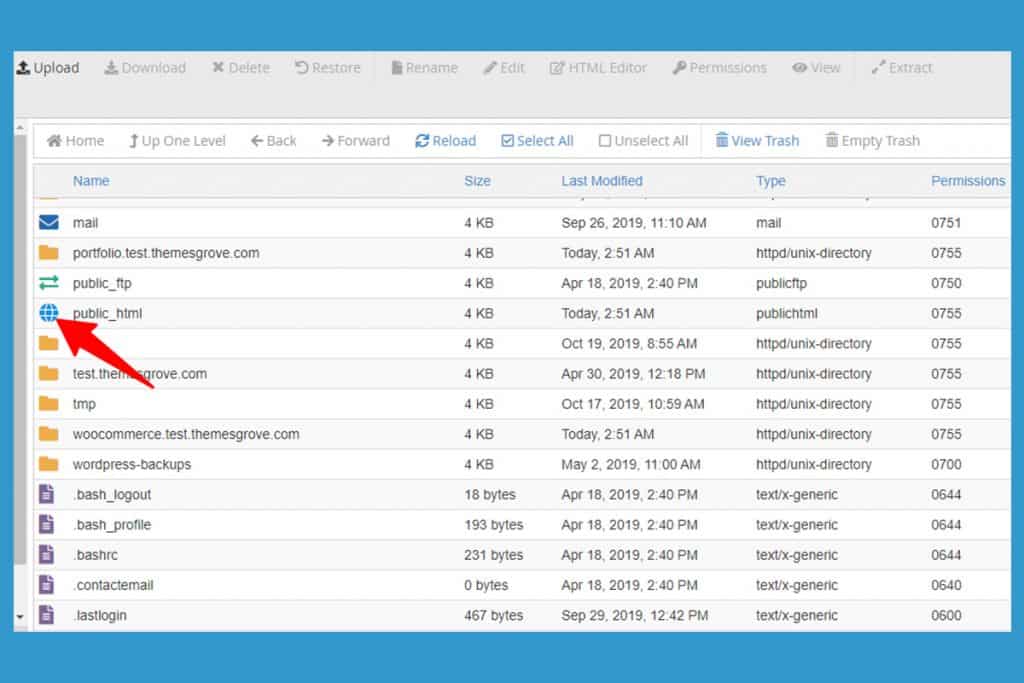
Step 03: Double click on public_html file
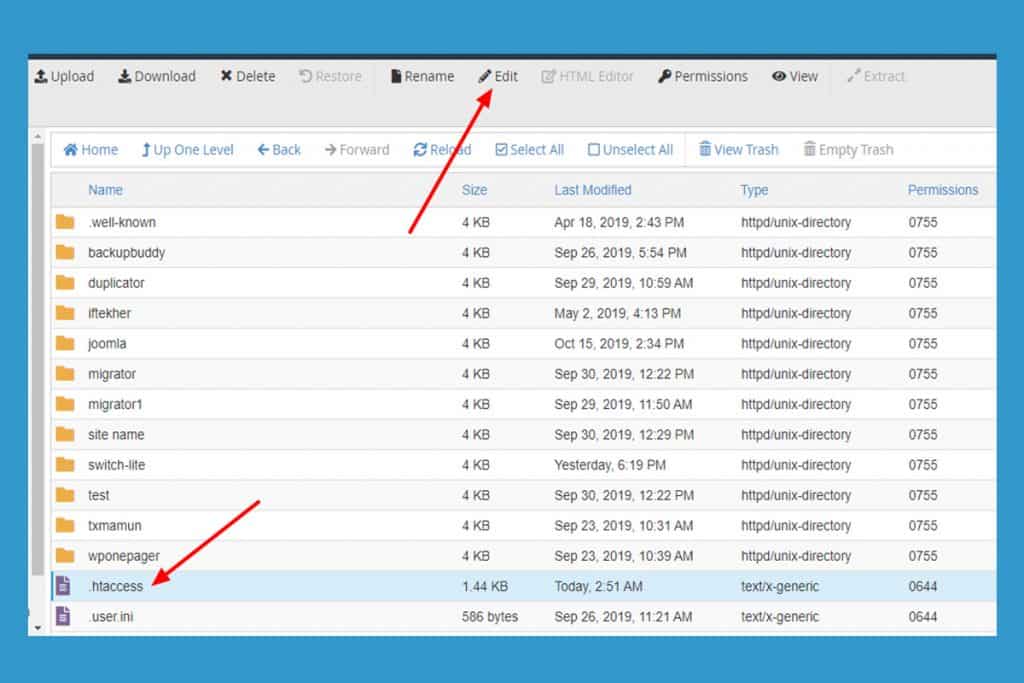
Step 04: Edit .htaccess file or create a .htaccess file in case it is missing.
Step 05: Paste following code or increase the max vars limit manually.
php_value max_input_vars 1000
php_value suhosin.get.max_vars 1000
php_value suhosin.post.max_vars 1000
php_value suhosin.request.max_vars 1000
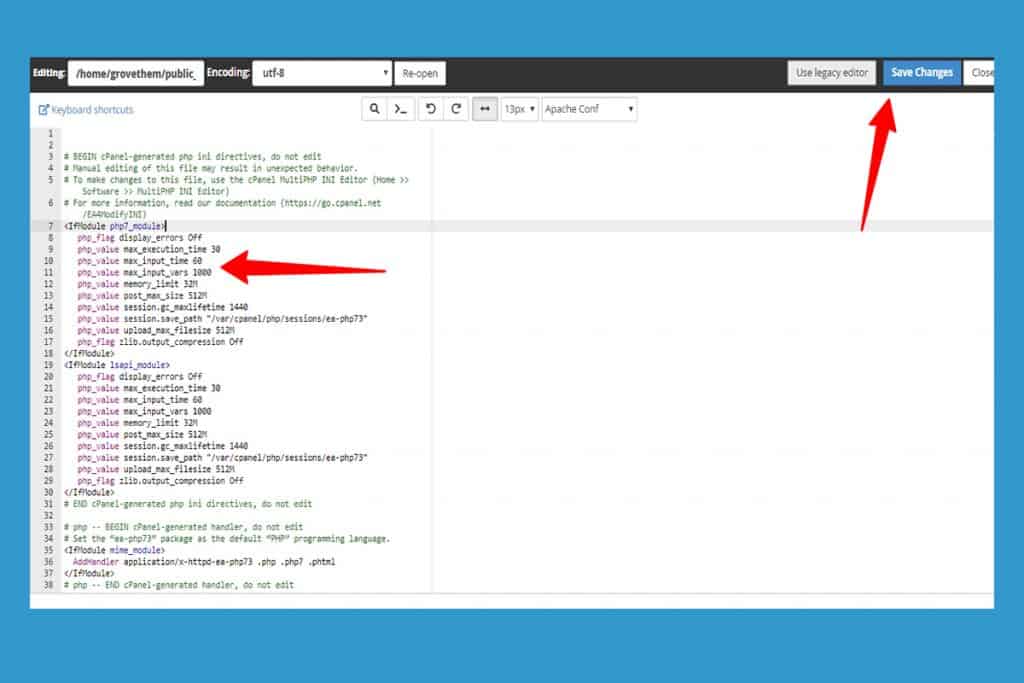
Don’t forget to click the Save changes button. Now, you’re done. If it still show you the error, then follow the below procedure.
Create or Edit php.ini file
Step 01: Login to your cPanel.
Step 02: Go to File Manager > public_html
Step 03: Edit or create php.ini file and paste the following code.
php_value max_input_vars 1000
php_value suhosin.get.max_vars 1000
php_value suhosin.post.max_vars 1000
php_value suhosin.request.max_vars 1000
Don’t forget to click the Save changes button. Now, you’re done. If it still show you the error, then follow the below procedure.
Global Configuration
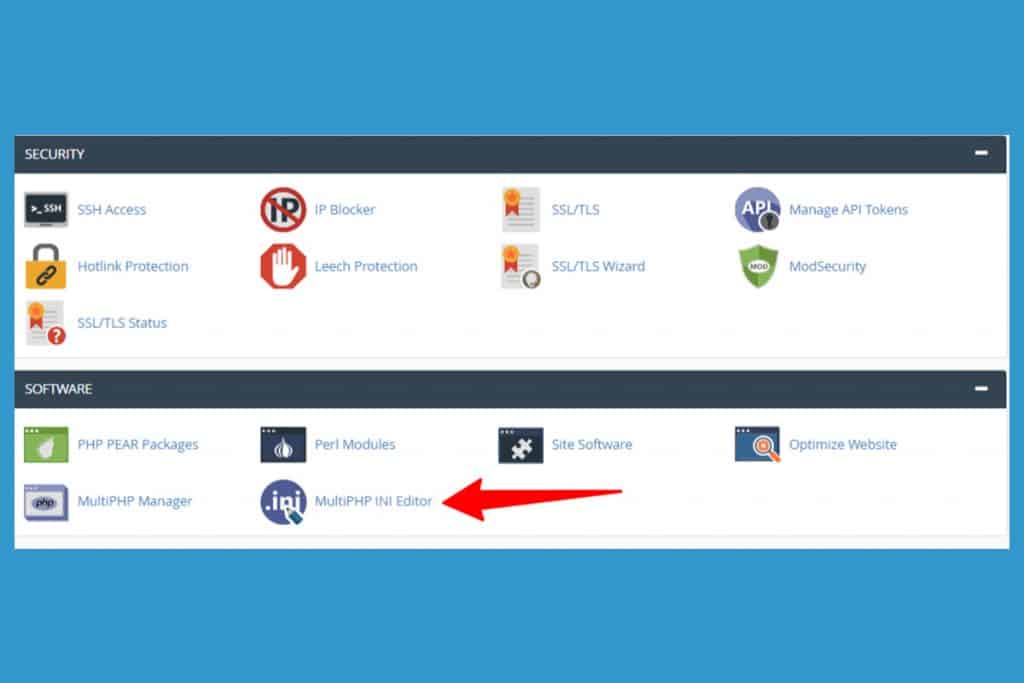
Step 01: Login to your cPanel and scroll down. Access MultiPHP INI Editor.
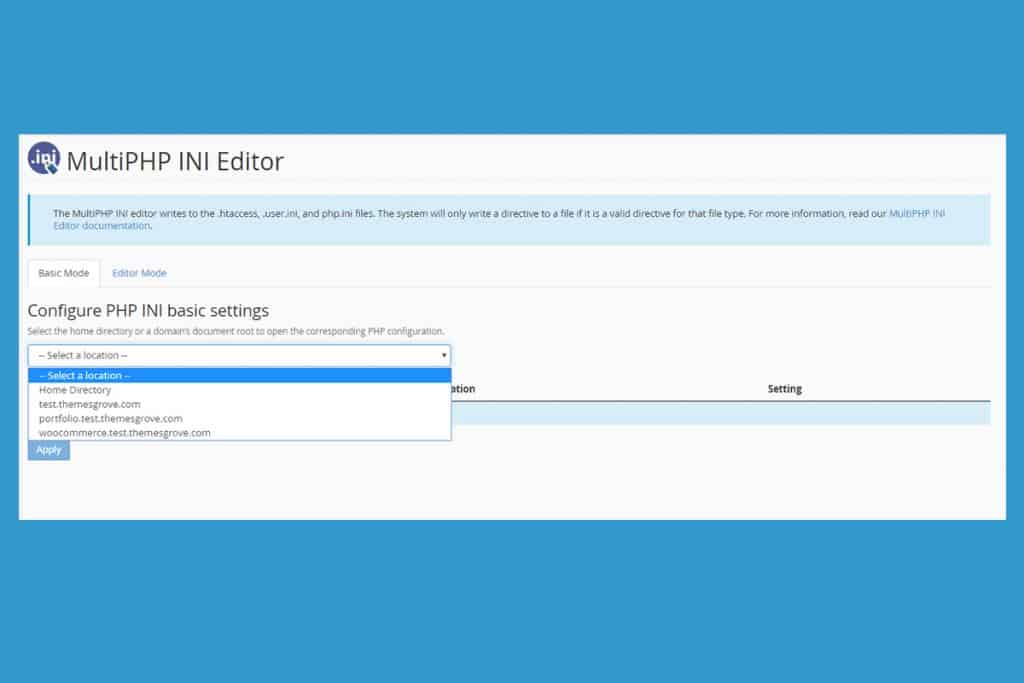
Step 02: Select Home Directory or other sub-domain as you want to configure.
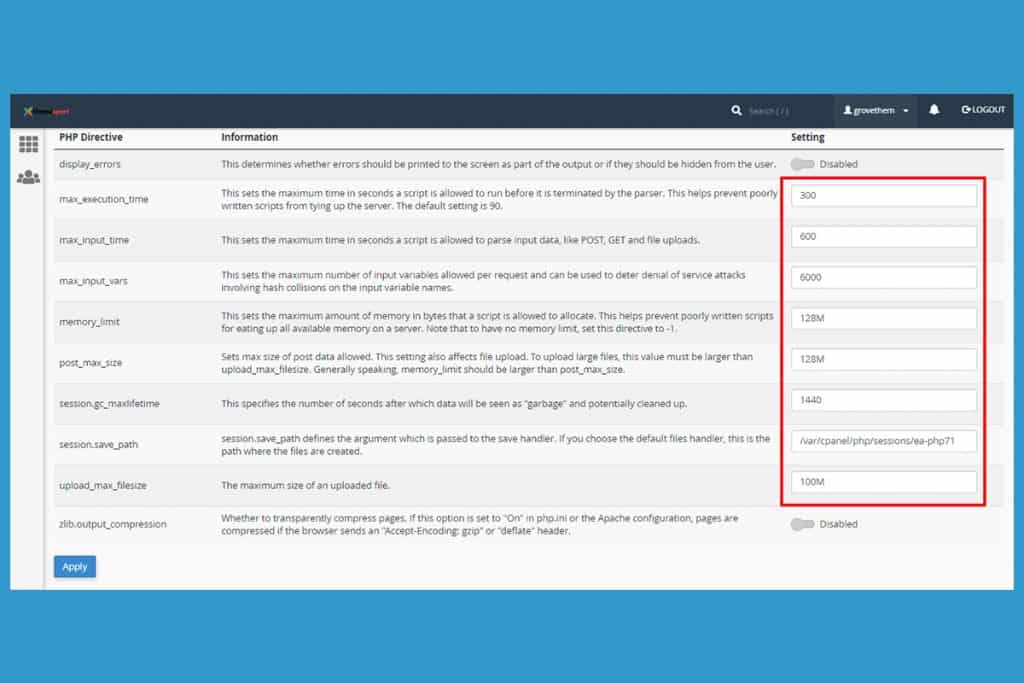
Step 03: Increase the value manually.
Check whether your problem is still appearing or not.
Troubleshooting steps
If the applied changes are not affecting and the error notification is still appearing, please follow below steps.
- Duplication of php.ini file: It is possible another php.ini file exists in your host’s directories (for example, inside wp-includes directory) which affects the above values. Check your host directories.
- Contact Host Provider: If you can not find the php.ini or .htaccess file or the applied changes are not working as expected, it is best to contact the hosting provider. They’re the first people that can help you further about this issue.
How to Increase the Maximum File Upload Size?
I’m going to demonstrate to you two ways to increase the maximum file upload size in WordPress. I think these gonna be enough to solve your problem. So, let’s check it out.
- Edit or create .htaccess file.
- Edit or create php.ini file.
Edit or Create .htaccess File
Step 01: Login to your cPanel.
Step 02: Go to File Manager.
Step 03: Double click on public_html file
Step 04: Edit .htaccess file or create a .htaccess file in case it is missing.
Step 05: Paste following code or increase the max vars limit manually.
php_value upload_max_filesize 64M
php_value post_max_size 64M
php_value max_execution_time 300
php_value max_input_time 300
You can increase or decrease those figures as you need and don’t forget to save the changes by clicking the Save changes button.
You’re done. Check whether your problem has disappeared or not. If it still exists, follow the second strategy right below.
Edit or Create php.ini File
Step 01: Login to your cPanel.
Step 02: Go to File Manager > public_html
Step 03: Edit or create php.ini file and paste the following code.
upload_max_filesize = 64M
post_max_size = 64M
max_execution_time = 300
Don’t forget to click the Save changes button. Now, you’re done.
Final Words
In this blog post, I have tried to discuss some of the common problems of PHP configuration that anyone can face while developing WordPress projects. All the above-stated strategies are examined by me, and I got positive results.
However, if you face any complications while correcting the errors, let me know through the comment box below.