After including the Lottie animation element in WidgetKit, we are here again with a firework for the Pro version of WidgetKit. From now on, LearnDash users will be able to give a different look to their course. Not only that, all users will also be able to import template directly from the template library.
Sounds cool right? With Learndash templates whole look can be changed, and new functionalities can be added. If you try to add these functionalities with external plugins, you had to spend a good amount of money.
With the template library you can import your preferred template with just a single click. Or you can directly edit your template after one click.
Let’s see the details of what we got in this version of WidgetKit.
What is LearnDash Template?
You all know about the template and the purpose of it. Similarly, the Learndash template does the same job. These templates let you customize the look of your default Learndash, add more functionalities, and thus help you to sell your course better.
The best part of the Learndash template is you can use the given templates, or you can create your own templates. You have full freedom to do it and create something new.
With Learndash templates, you can do a lot of things, but the highlighted ones are:
Change The Look of LMS Page
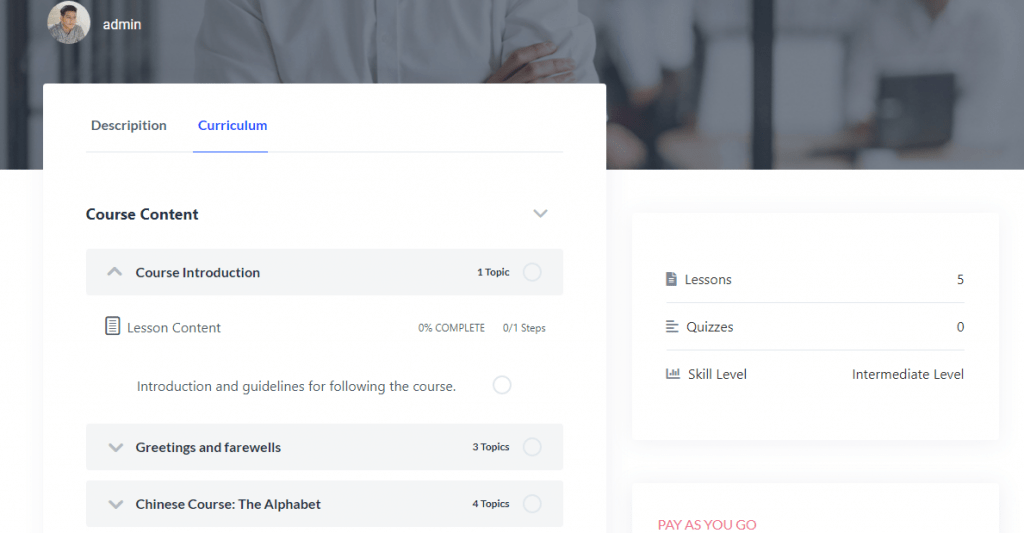
Learndash LMS comes with a default view for your courses. Without raw coding, you cannot change the style and look of the course curriculum. You can’t even show any extra information without adding extra paid plugins.
With WidgetKit’s LearnDash Elements, you can easily show this extra informations and change the look of your page very easily.
Show More Details of Course
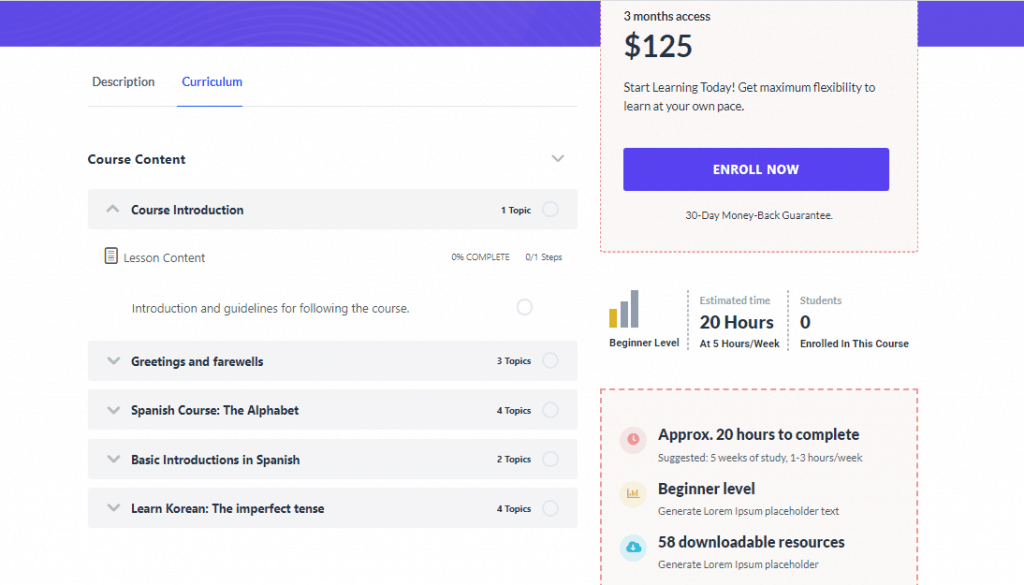
Learndash Template comes with dedicated Learndash elements in WidgetKit. With these elements, you can show
Course Banner – Show information related to your course in the banner.
Learndash Course Certificate – Show the certification status to your students.
Learndash Course Enrollment – Shows the details about course length, price, enrollment status, etc.
Course Meta Info – This element allows you to show the difficulty level, of course, estimation time, student enrolled in this course, and other meta information.
Learndash Course Progress – Show the course progress of the learner.
Learndash Course Resource – Let your learners know about course resources like lessons, quizzes, skill level, etc.
Learndash Couse Tab Content – Show all the important information of course, in tabbed order.
Learndash Related Course – All the related courses will be smartly presented to the visitors and learners.
Learndash Course Curriculum – Show all the course content in one place with this element.
Learndash Course Instructor – Represent the instructor data smartly with this element.
See, there are lots of extra things to show in your course. Insert elements in the Learndash template and show more details in the way you like.
Exclusive Layouts

Your courses will never look the same again after using Learndash templates. Change the look and add new functionalities with Learndash templates of WidgetKit.
Create your own template or use the exclusive layouts that are packed with Learndash templates. Currently, there are four elegant layouts for Learndash. Soon this number will be increased, as we are developing more templates.
Create and Reuse
We like to make our clients workflow easier and better; therefore, we minimize the barrier as much as possible. You can create unlimited Learndash templates. Then use them in the way you like. You can use the same template in multiple places.
If you like to use your template for a later time, make it JSON and save it somewhere safe. Then in the time of need, import it and use it.
How to use LearnDash Templates
Setting up Course
At first, make sure you have installed Learndash LMS, WidgetKit and WidgetKit Pro plugin.
From Dashboard, go to LearnDash LMS -> Courses and click on Add New button.
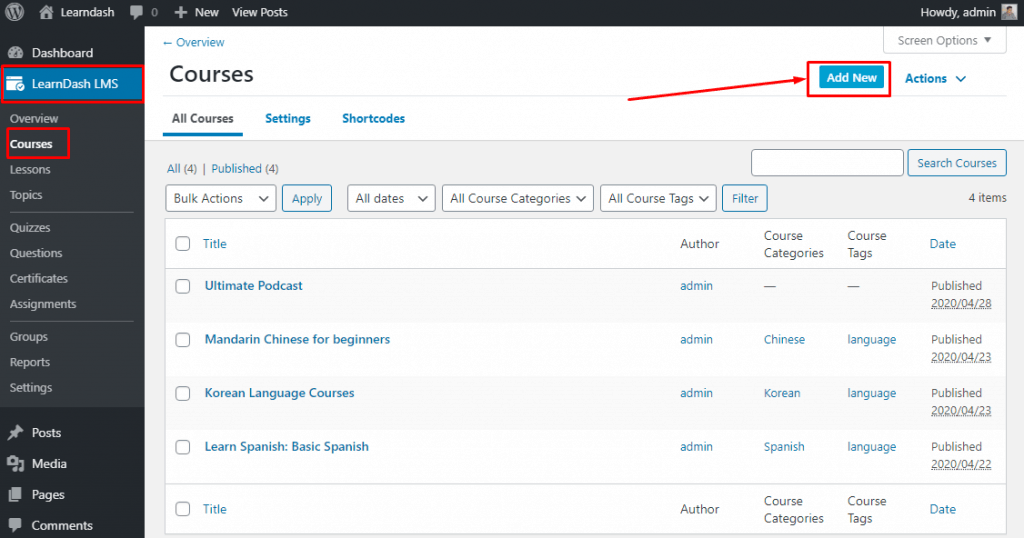
You are now on the Course page tab. Add course title, content, cover photo, short description, course difficulties level, course estimated time.
Now from the right sidebar, choose course category, set course tag, and set featured image.
[Note: If you set wrong data at here, or set no data, your template will show wrong data or no data at all.]
Switch to Builder then, set lessons, section headings, and quizzes on demand. Don’t forget to manage the settings and hit the publish button. Now your course is successfully created.
Creating Your Own Template
Go to WidgetKit -> Learndash Templates and click on Add New button.
Give the title to your template and select the Learndash course. Now click on the edit template button.
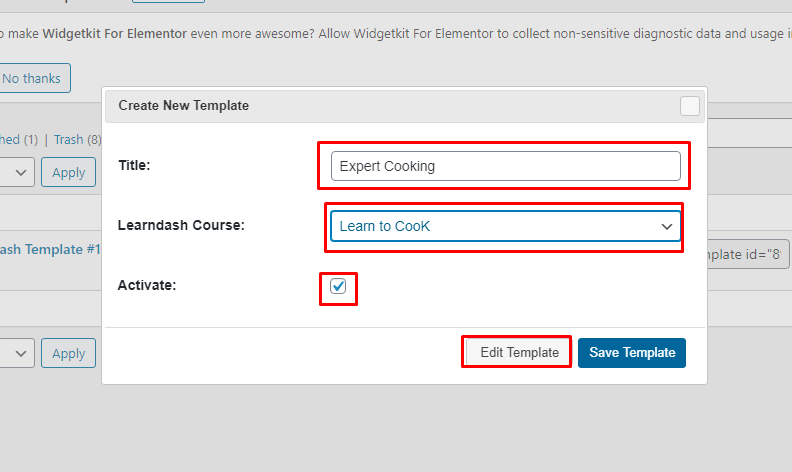
[Note: All the data will be shown directly from the selected course. ]
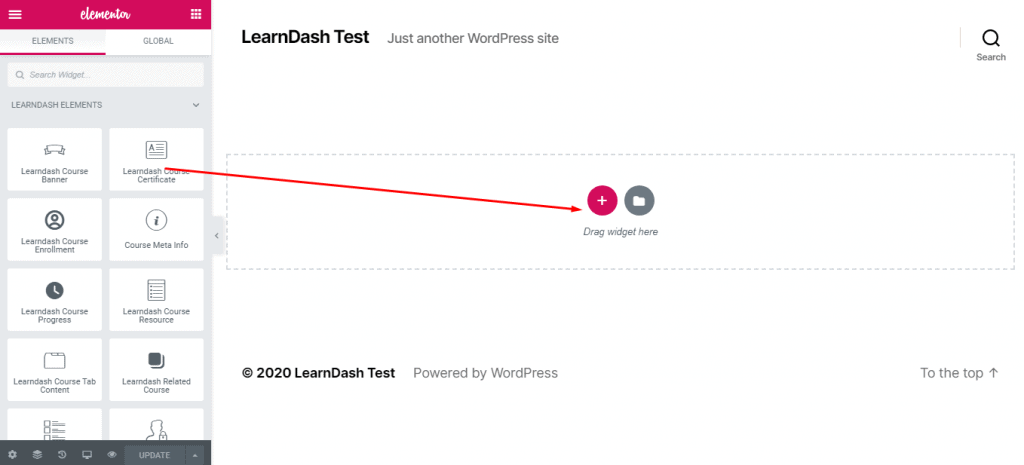
Now create your page in the way you like with LearnDash Elements of WidgetKit.
Using Our Customized Templates
If you don’t want to create one choose from our elegant templates for your Learndash page. Currently, there are four templates, choose the one that you prefer.
Go to WidgetKit -> Template Library and scroll to the bottom. Click on your preferred template.
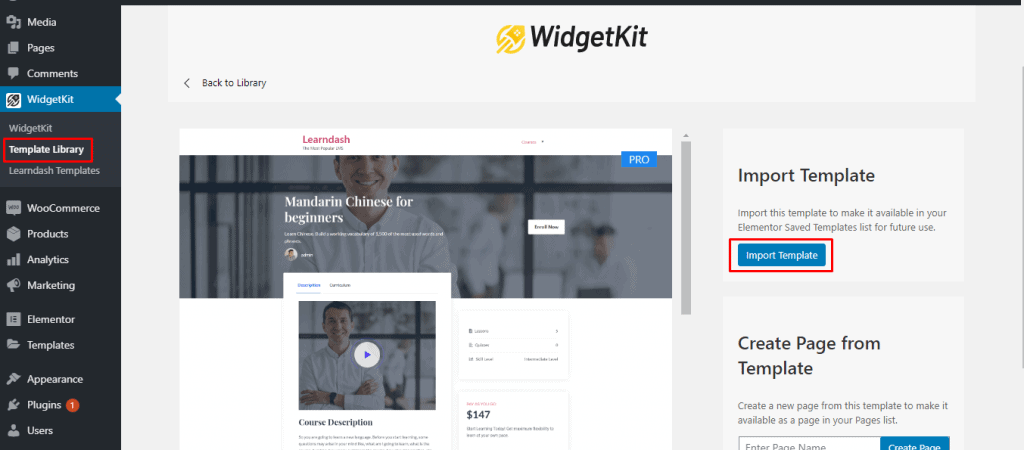
Now click on the import template button, template will be imported successfully.
Now go to WidgetKit -> Learndash Templates and click on Add New button.
Give the title to your template and select the Learndash course. Now click on the edit template button.
[Note: All the data will be shown directly from the selected course. ]
Click on the Add template button.
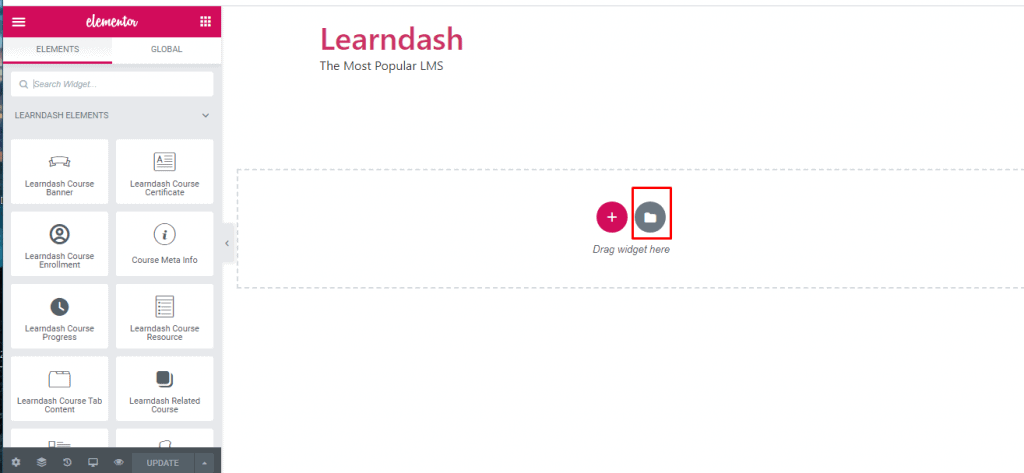
Click on the import template button and choose your template that you imported a few moments earlier.
Now bring the changes as you need.
New Template Library
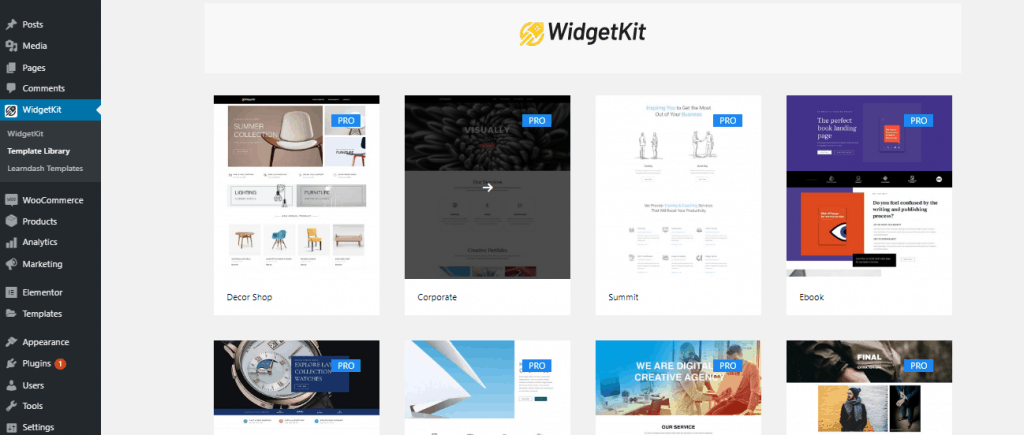
From now on you can import your template directly from WidgetKit’s template library. All the templates that are included in the WidgetKit can now be found at the template library. You can preview all templates directly from there and import your preferred template.
You can also edit the template directly after the import process completes. Click on the edit button and you will be editing template directly from there.
Last Words
Hope Learndash templates will help you to customize your Learndash course page and sell more courses. If you have any questions, feel free to ask in the comment section below. I will be happy to reply you back.
Stay tuned for next attraction coming in WidgetKit.

